Showing posts with label projects. Show all posts

Monday, 21 January 2013

Joining in

In an uncharacteristic turn I have signed up to join in a community activity. Admittedly this is an online community activity, not a real life one, but it is definitely pushing my comfort zone. On top of that I have committed to making  things, as per our shared monthly goals and challenges, out of some of the fabric I have stashed around the house – you know, in my sewing corner, in the stationery cupboard (yeah, I know), disguised as household linens, a box in the loft… This month’s goal is to use up some of the smaller scraps, which is going well so far.
I am also determined to actually make some clothing this year – especially as I have  a length of fabric bought specifically to make a skirt, which hasn’t happened yet. I also earmarked a couple of charity shop finds to make dresses for my daughters that really need to happen in time for this summer.
 Sewalong fabric
Watch this space…

Sunday, 6 January 2013

Christmas round-up

This year I thought I might actually post about all the Christmas making I did before next Christmas rolls around and the whole thing becomes irrelevant. Not that it is terribly relevant now, as those people who received handmade gifts know what they look like and those who didn’t probably don’t care. But it makes me feel validated, and offers some kind of justification for working flat out for the last month.
There were:
Christmas-scented decorations -
Decorations 1 Decorations 2

Fridge Magnets -
Fridge Magnets Pink Fridge Magnets Rose

Memo Boards -
Memo Board - gold Memo Boards - pink and green

Pencil Cases, Tea Towels, a Bow Tie, a Cushion and some Bookmarks -
Pencil Cases Penguin tea towels
Bow Tie WP_001152
Black bookmarks And apparently I completely failed to photograph (!) the shirt style peg bag I made.
Not to mention the awesome superhero cape and mask for Super Cali (and her dad).


So... on to the next year…

Saturday, 9 June 2012

It’s been a busy week.

I approached this half term week with some trepidation, as there was just so much to do!
Jubilee Cake 2
We started out with the Jubilee weekend, and the grand cake making.

Stripy Drawstring Bag

This was supposed to be followed by a day out in the New Forest with some grandparents, but Matthew broke his toe on the Bouncy Castle at the Jubilee Party, so Monday was cancelled. Instead we made another stripy back pack for a birthday present.


Baby Bunting-AliceThen we had lovely visitors and some horrible weather which we combined with making more Baby Bunting for a new baby and tried to have a picnic on the most ridiculously wet day of the whole week.
Six CakeBakingHaving said goodbye to Grandma and Grandpa, we made cakes like they were going out of fashion (2 birthdays this weekend), and Butterfly Cakepersonalised them! (Gotta love ready roll coloured icing).
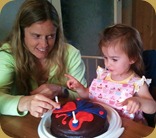
Birthday GirlA bit of frantic beaching, an outdoor birthday party and then a family tea for our own birthday girl and we are about done…

Roll on school.

Friday, 1 June 2012

Oriental Tea (towels)

This very exciting (in a tea-towelly sort of way), because I am about to get paid for sewing for the first time!
WP_000353My sister in law wanted some tea towels for her kitchen which were a little more individual than the regular shop bought/Cath Kidston style tea towels which she had seen so far. So a few weeks ago we did a little research and found some cotton duck which she liked.
WP_000335


After a ridiculous amount of time spent measuring and calculating and curling up in bed feeling rotten I actually cut into the fabric and have just despatched “6 Oriental Blossom Tea Towels in Fawn and Duck Egg Blue”. Hopefully Sue will like them as much as mum and I do.

Because of the way things have turned out I actually have another pair soon to be listed on Folksy once we have done a little photo shoot (that doesn’t involved my camera phone and the washing line).

Friday, 17 February 2012

I did it!!

Denim Ribbon skirt
At last, I have actually made a garment of clothing for one of my children. It is not the most stylish of articles – just a simple gathered skirt in bits of denim salvaged from a trouser leg, and a remnant of ribbon – but it fits and looks right. Not that Robin has kept it on much this afternoon, but that is more to do with her recently acquired skills in undressing herself than any reflection on my sewing (or so I like to think).

Robin is really working the urchin look at the moment!

FYI, the large warts over her right knee are in fact gathered flowers (one in denim, the other in white satin ribbon). I could not get them to photograph at all well.

The key benefit of this skirt (aside from the fact that Robin gets an item of clothing out of it) is that I was able to practice a few new techniques. Namely, fake overlocking the edges with zigzag stitch, fitting elasticated waistbands and binding seams with ribbon to hide the unsightly edging and reduce bulk. I may well have another go with lighter weight fabric and other decorative techniques. Watch this space…

Wednesday, 15 February 2012

Still reeling, and utterly biased

Since Christmas I have been rearranging and massively tidying my working area so that I can actually do things at my desk other than just move the same pile of rubbish around.
Part of this involved sorting out all my thread so that I can see what colours I have when setting up for a project. I have quite a lot.
Cotton Reels1
Cotton Reels 2
I then realised a needed more reels for storing all my biased binding and other ribbons and strings. I found these very reasonably priced at The Stamp Attic.
Reels 3
Some of the binding/tapes are shop bought, but now I need never buy bias binding again as I have these:
Bias Tape Maker
They look a little odd, but are very good! Once you have fed the unfolded tape into the gadget  you then pull it through and it comes out folded and just needs ironing to stay flat. A distinct improvement on my previous technique which mostly involved singeing my finger tips! Thank you to everyone who gave me one of these for Christmas or my birthday!

Wednesday, 9 November 2011

Too hot to handle

In amongst all that bean bag making and birthday caking we had a few other birthday presents to give out; two in particular featuring more items handmade byGaenor (or me).
They were actually both pot holders, but were probably as different as two insulated fabric squares could be…
2011_09_25_08_04_42Article 1: Floral pot holder for my mother-in-law, made of vintage floral fabric with blue gingham trim, quilted in a geometric pattern.
Article 2: A more masculine pot holder for WP_000285my step-dad to use with his new toasting fork. A bit quilted, but mostly so it all stayed together.
Mum wants them now (mainly because of the fabrics).
Inspiration for both of these came from this site, but don’t look too closely – they have lots of interesting ideas which I plan to adapt, perhaps for you!

Friday, 30 September 2011

Circumference=2πr

It was pointed out to me recently that I tend to knock up items, or throw them together. By contrast this week I am carefully, lovingly and with due care and attention, making a bean bag. Not least because I am having to scale up the pattern instructions in order to do so.

It is based on the bean bag in Cath Kidston's "Sew!",Bean Bag crop but that is designed for toddlers. Which my boy isn't. By quite a few inches. So I have been re-acquainting myself with π and circles. A few calculations later and I have a scaled up set of dimensions to cut out of half a duvet and a remnant, while making sure that the stripes all head in the same direction. Fortunately I got to do a dummy run on plain fabric as it needs an inner to actually hold the beans. So far so good.

Watch this space for photos of the finished article – hopefully within the next week! If it takes any longer it may have to be abandoned in favour of my great cake baking marathon (also known as Cathy’s Birthday – more on that after the event!).

Friday, 16 September 2011

Ta-da!

I did it! I really did! I am now the proud owner of a Folksy shop. For those of you who haven’t come across Folksy, or had your ear bent by me recently, this is an online market place for craft sellers. I can now be found selling at www.folksy.com/shops/byGaenor
folksy screen shot


My first item for sale is a remake of my first apron in a pretty vintage floral fabric. As with all the other aprons I have made for the children this uses my adjustable cross-over straps which means that while they are small we don’t have to tie knots or perform contortions every time we fix them on and as they get taller (and their heads get bigger) their aprons will still fit (yes, even over heads and ears!).
It is a very little shop at the moment, but I plan to add to it amidst all the sewing I have planned for family over the next few months. Watch this (or that) space.

Wednesday, 14 September 2011

Busy, busy, busy

But I can’t tell you about it.
Partly because we are in birthday season, so I don’t want to include any spoilers (and in our family birthday season segues quite quickly into Christmas…)
Also I have a special project in hand, and I don’t want to tell you about that until I have everything in place. Watch here for the big announcement – hopefully before next week.
In the meantime enjoy this bonus photo of my daughter modelling her cousin’s birthday apron.
2011_06_08_17_41_11

Monday, 22 August 2011

Painting and Decorating

By which I actually mean demolishing and rebuilding. Despite the children going on holiday without us, this last week hasn’t been spent in a flurry of creativity, but instead has been sheer hard slog.

While the children were away seemed a good time to decorate my son’s bedroom which was sporting a decrepit lilac carpet and pink woodchip walls.
We knew one of the walls was going to be a challenge (I accidentally poked a hole in it months ago) but it pretty much matched our worst fears.  So we stripped it back to nothing (which seemed to take forever) and then panelled it!

Bad Plaster Panelled Wall
Before
After

And then we patched other bits of wall with plaster. Filled holes. Painted. Collected the children. Painted again. Painted another colour. And Again. And then did it all again. Painted some skirting board (badly). Smudged some paint and then laid a new laminate floor.

Finally we got to put a new bed in and some other furniture and called it finished. I am very happy with the end result – and so is my little boy!
Finished Room